After creating your Bizzfo Hive account, it will be required for the company details to be set up via the Hive. This step is extremely important as it is the vital information of your company that needs to be entered on the Hive. This information range from your VAT information, company details, banking details, etc.
Below are the steps that one needs to set up your company details and all the relevant information, before anything else.
This is how to do it:
Step 1:
- Open the Hive account via your web browser (preferably Google Chrome) by using https://hive.bizzfo.co.za/ and entering your username and password to log in.
- Once on the Home Screen of the Hive, navigate to the “User” icon at the top-right section of the screen.
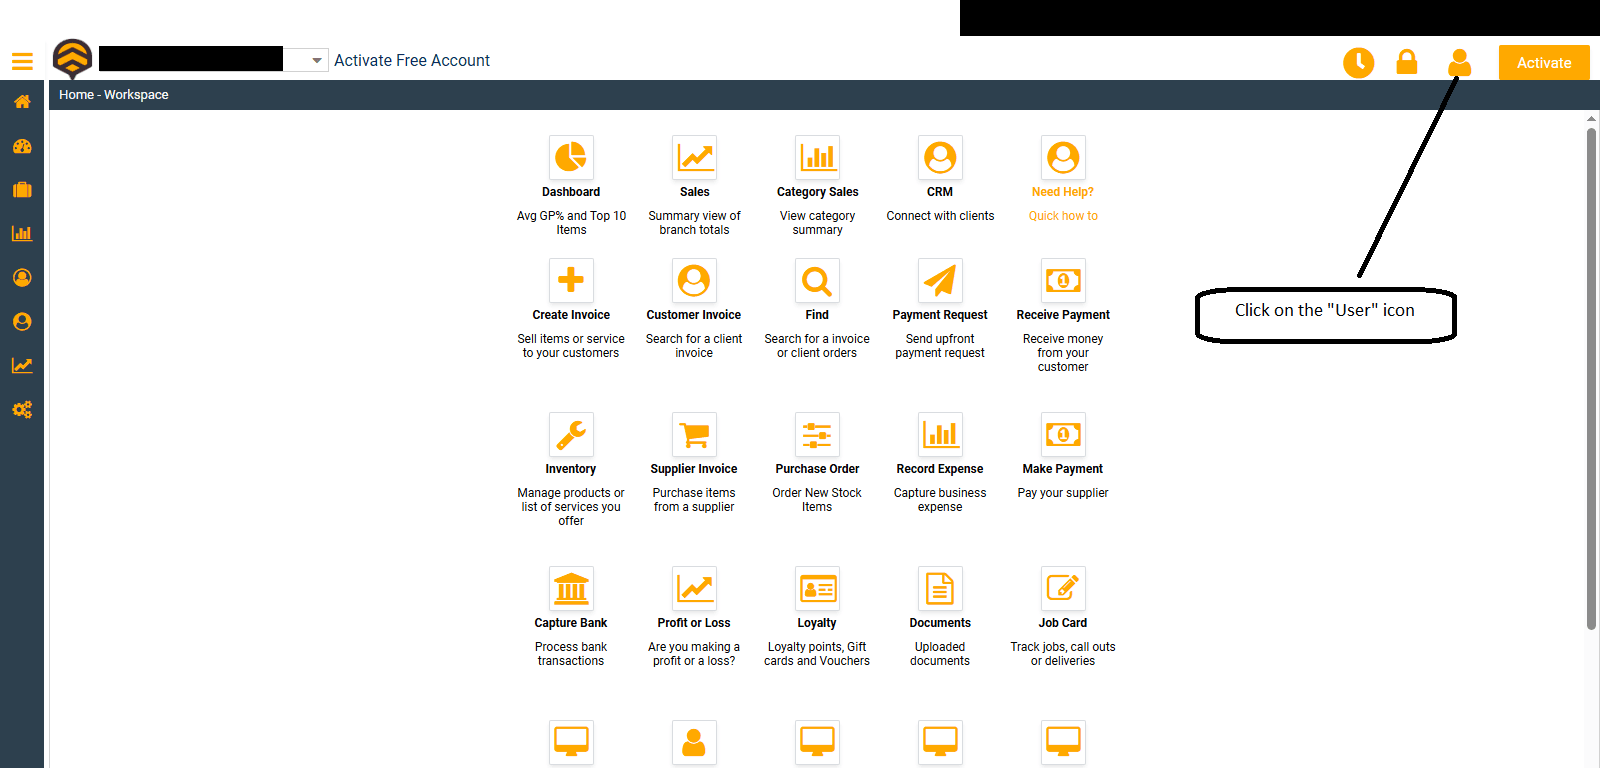
Step 2:
- Once in the “User” screen, it will automatically open the “Provider Details” screen, where you will be required to enter the details as set out on the screen (as seen below).
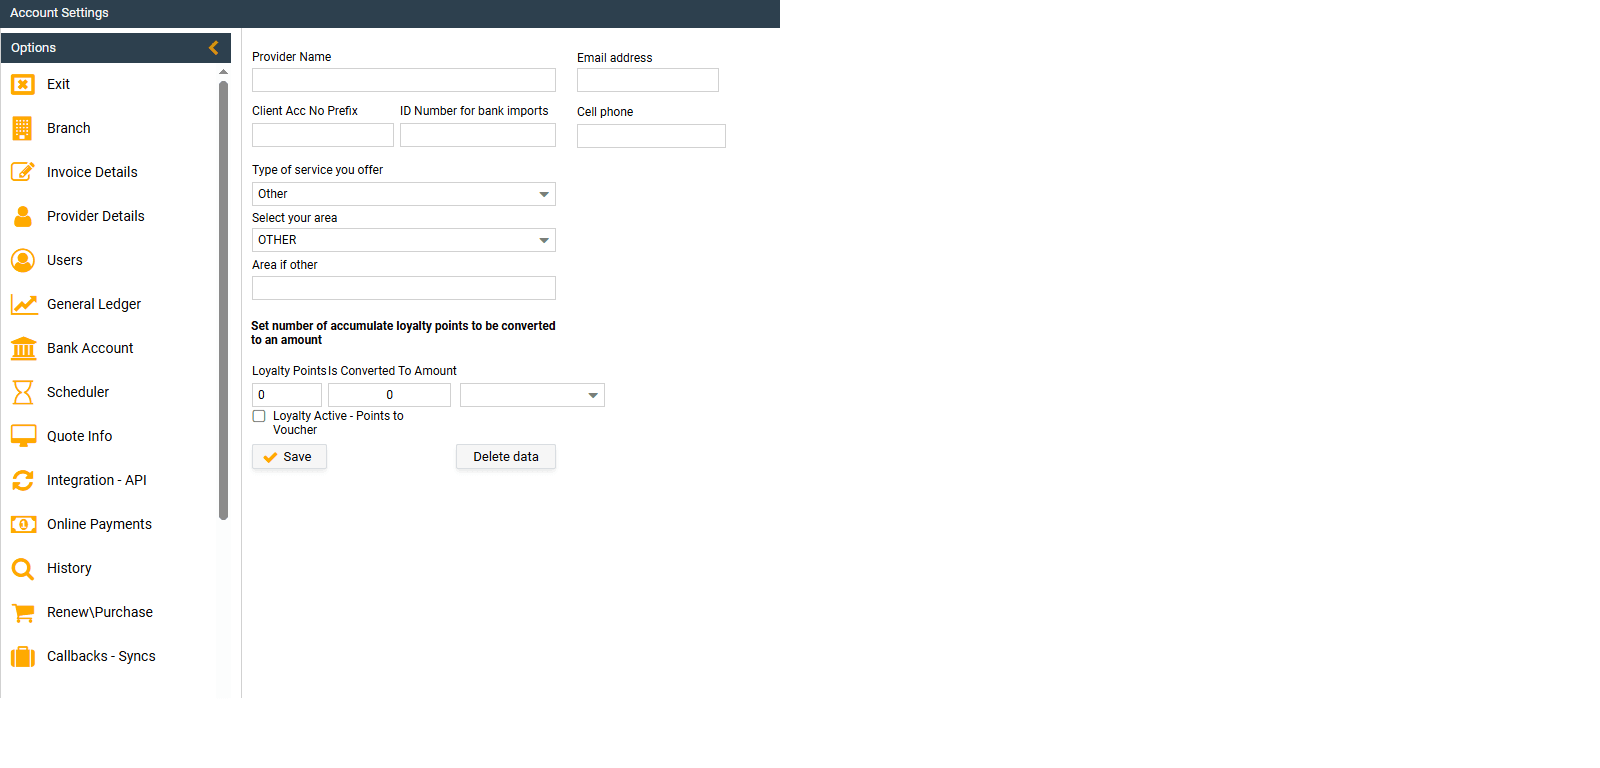
- Once the screen opens, the client will be liable to enter the “Provide Details” as shown on the snip above. This is where the client will be able to provide information to the system to state the nature of their business, location, Account number prefix and ID number for Bank imports.
- After entering the details, as seen above, hit “Save” and the information will be saved.
Step 3:
On the left tab are headings (as seen below) of the different screen required to be filled out by you as the client to ensure that all company information is entered and saved within the system.

As per the image above, the different screens are number and will be discussed below:
-
Branch: Is where the client will be able to create their branch or branches. (https://bizzfo.co.za/docs/how-to-create-your-branch-in-the-hive/)
-
Invoice Details – Where the client will create the invoice details of the company. This information is default entries to the Invoices sent to clients or suppliers and it is information such as the VAT/Tax number of your company, Email address, contact number, VAT percentage, address of your company, Liquor license number, etc. This information is fairly straight forward and hassle free.
-
Users – Where user access is given to the employees at the establishment and what access the specific user would have on the system by entering the users email address for the user to gain access and grant the user full, partial, or specific access to what the user is allowed to access in the system.

- “User Access” – Hereafter, navigate to the “User Access” tab on the same screen, which will give you the ability to grant access to the specific employees of the company.
- “Linked Accounts” – Will show the accounts linked to your profile.
4. General Ledger – Where the setup of the ledgers will take place, if there are any.
5. Bank Account – Where the bank accounts are set up.
6. Scheduler – Where the scheduler is created.
7. Quote Info – Quote information set up of the company
8. Integration/API – Where the integration set up is done, eg. Xero Integration (you can ask assistance from the support team with the integrations)
10. Online Payments – Online Payment information, eg. Payfast – If you have a online payment platform like PayFast, you can thus add your details here and your clients would be able to make payments to you via your online payment platform for easier and hassle free transactions.
11. History
12. Renewals and purchases ( irrelevant, as we have a dedicated WhatsApp page for your support queries and requests)
13. Call backs and syncs.
After successfully entering all the required fields, as discussed in this article, you are one step closer to having a seemless experience with Bizzfo. Ensuring that all the company information required is recorded, which will assist with creating invoices, quotes, knowing your tax information, etc.
Once all of the above screens are completed, then we can move over to the next section in your onboarding journey!