Sometimes a business requires a custom discount type for specific scenarios. To set this up, follow these steps:
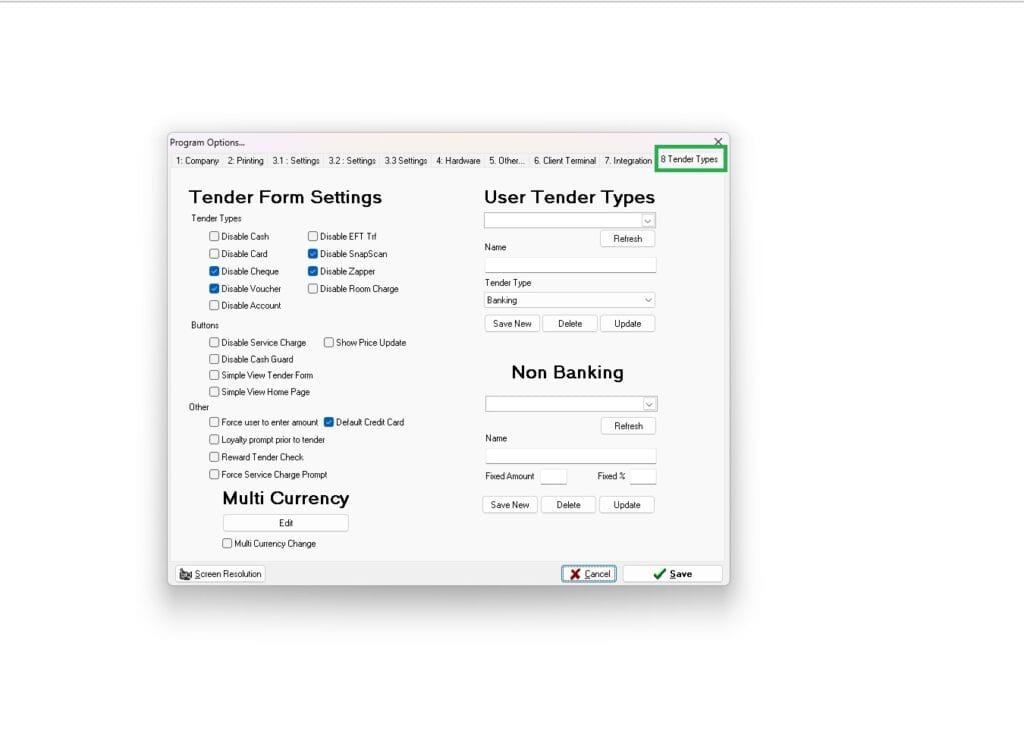
Step 1: Navigate to Settings
- Go to Settings

Step 2: Create the Custom Discount
- Navigate to the Tender Types screen.
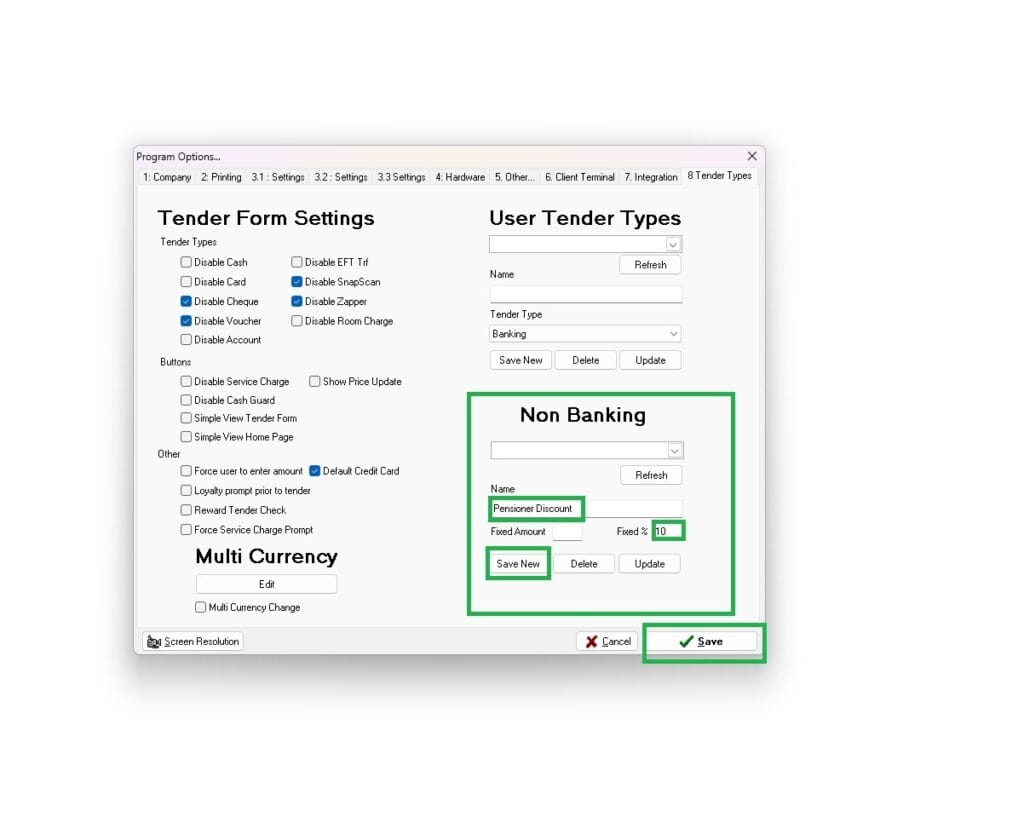
In the Non-Banking block:
- Enter a name for your custom discount
- Specify a fixed percentage (%) or amount for the discount (optional)
- Click Save New
- When prompted, confirm by clicking Yes
- click Save
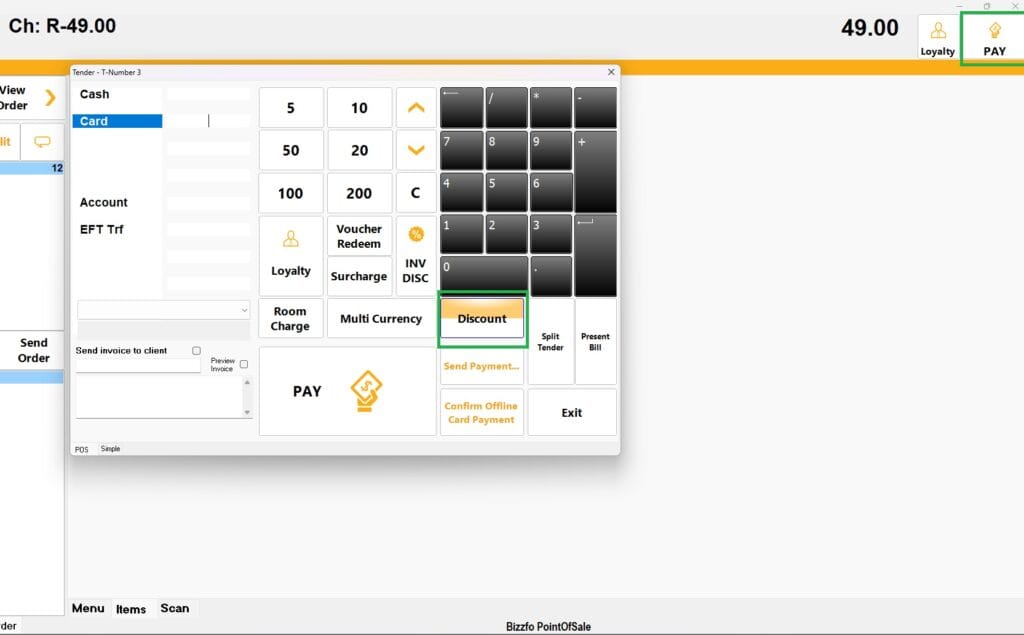
Step 3: Apply the Custom Discount To a Sale
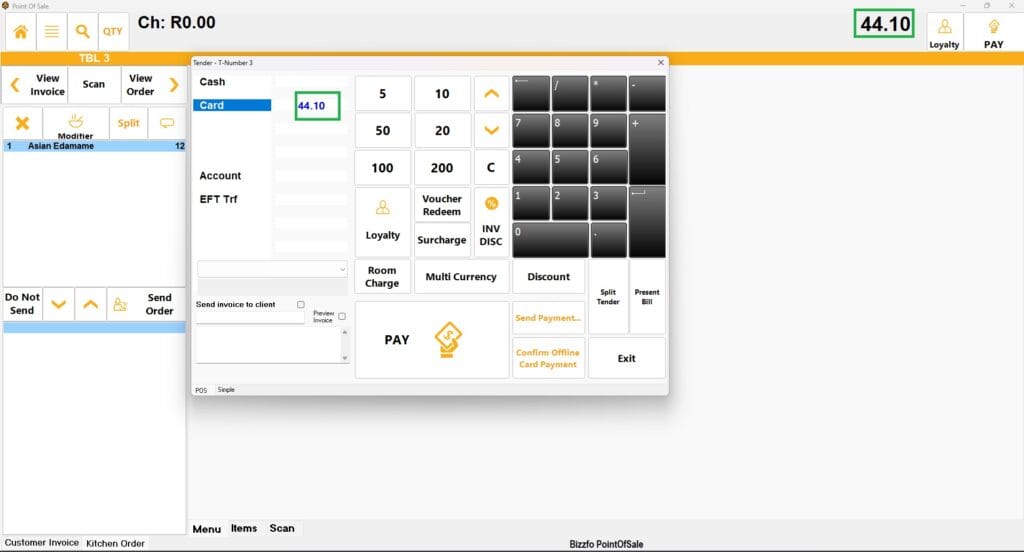
- To Close a sale, click on Pay.
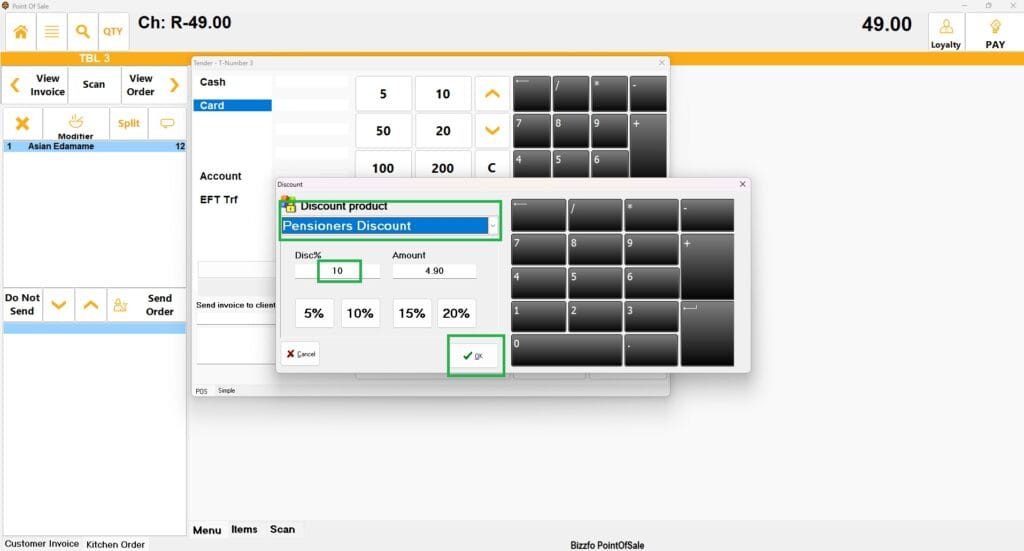
- On the tender screen, select Discount.
- Use the dropdown menu to view available custom discount types.
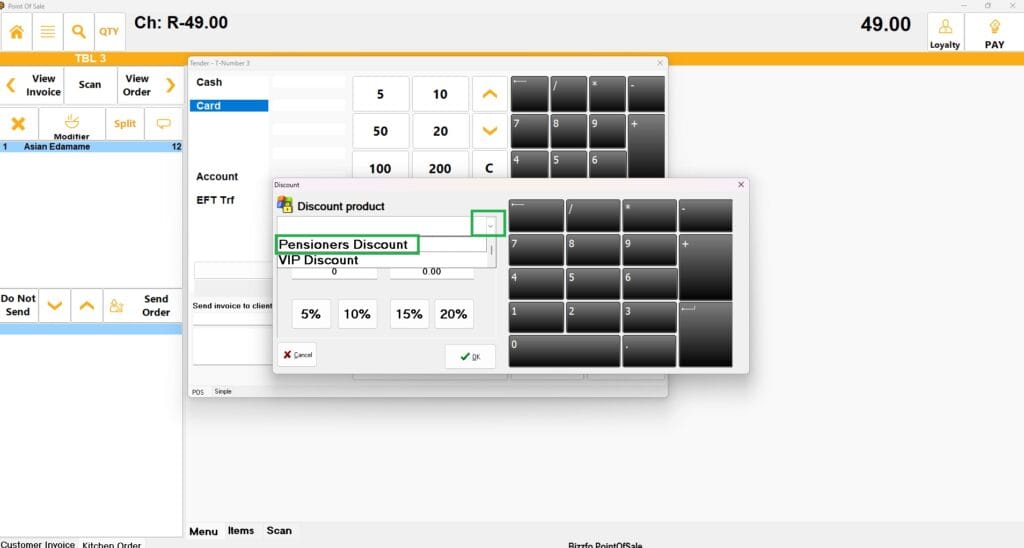
- Confirm the discount details (the percentage or amount will load automatically).
- Click OK to apply.
Result:
- The discount will be applied to the sale.
- If the appropriate settings are enabled, the slip will display the discount name and amount.
Important Notes:
Ensure all discount settings are correctly configured before applying them during sales.
By following these steps, you can create and apply custom discounts effectively, offering flexibility in your pricing strategy.


