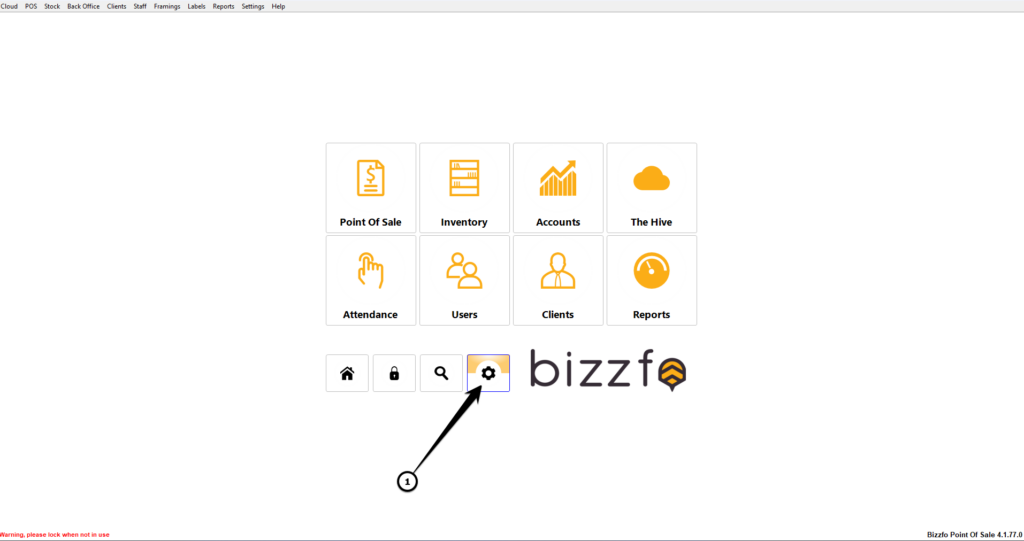
- On the home screen navigate to the system settings by clicking on the settings button
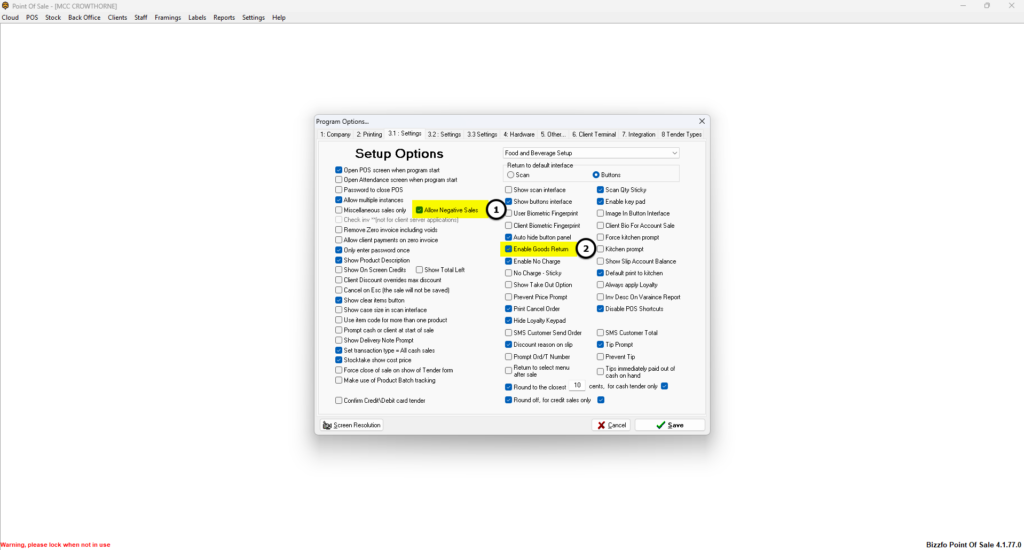
2. When navigated to settings activate these settings in Settings 3.1:
-Enable Goods Return
-Allow Negative Sales (When exchanged item value is less than original purchase)
Then Click on Save
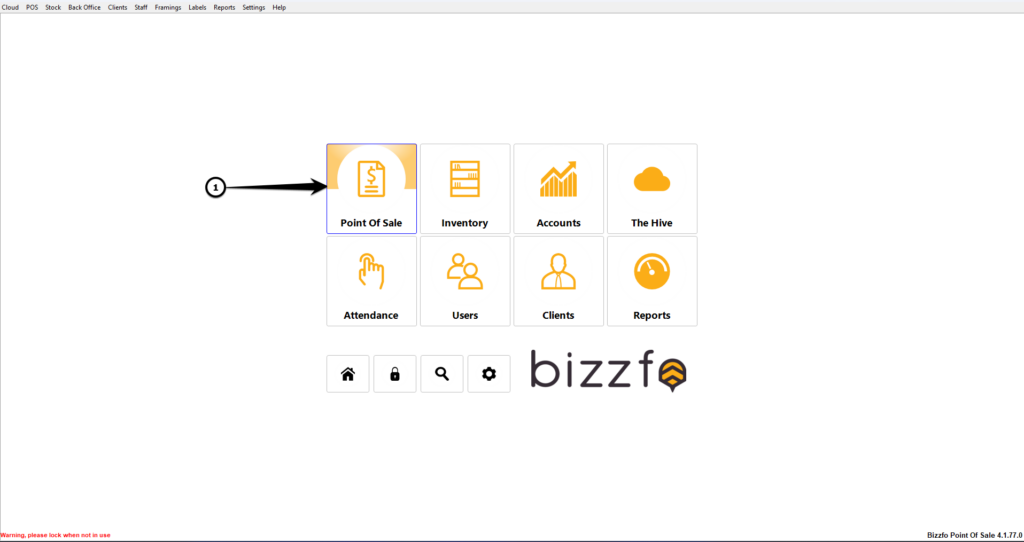
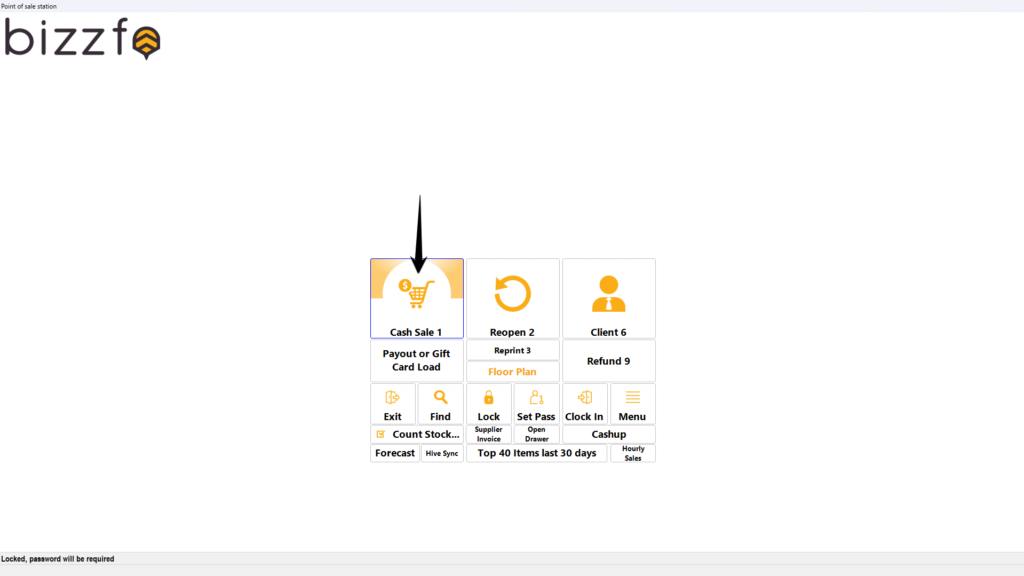
3. After save is complete click on Point of Sale and choose the Button interface or the scan interface depending on your setup
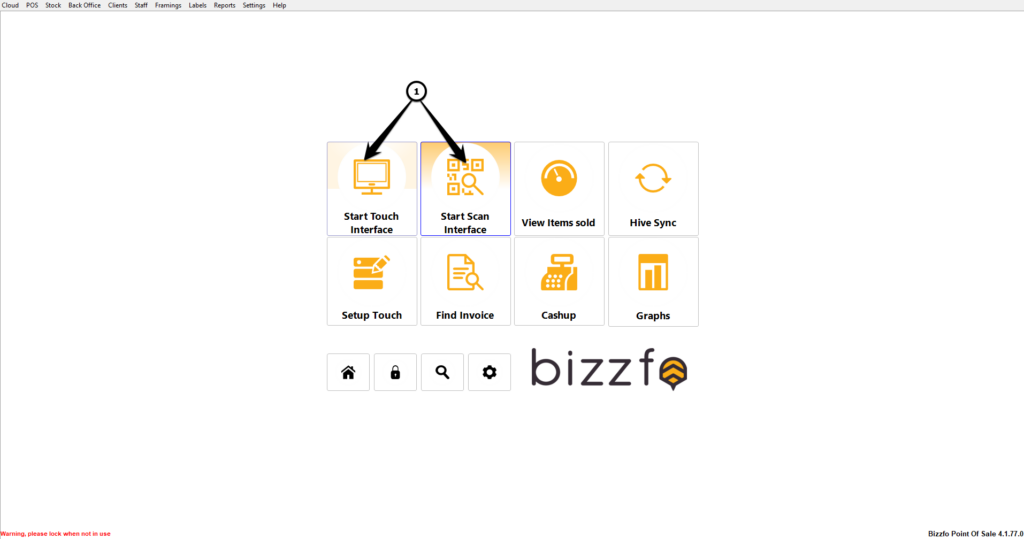
4. When on the correct interface click on the Cash Sale option to take yo to the Sales screen
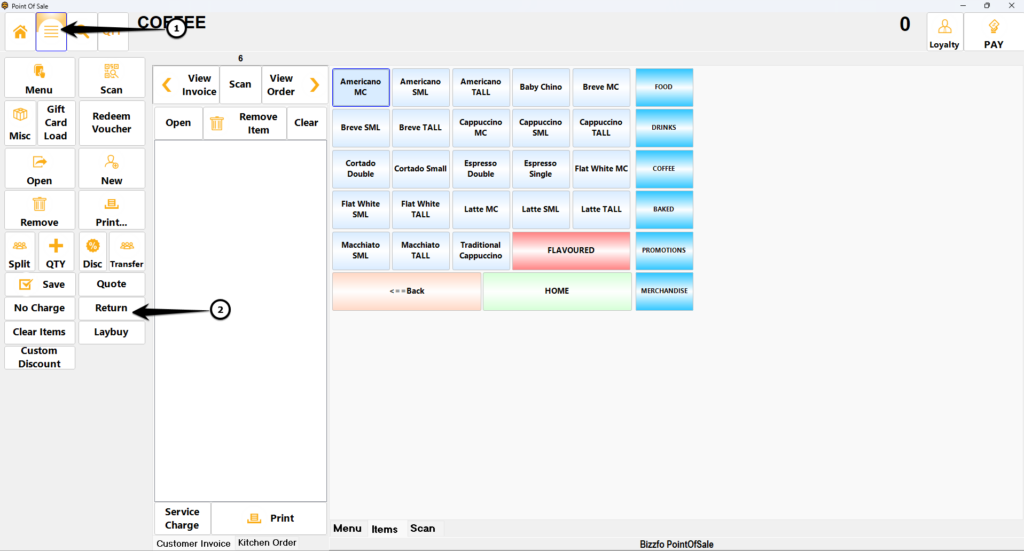
5. When in the sale screen navigate to the more options button and click on it to expand more options marked by the three horizontal lines(clicking on it again will hide from view if clicked by accident)
-Your next step will be to click on Return
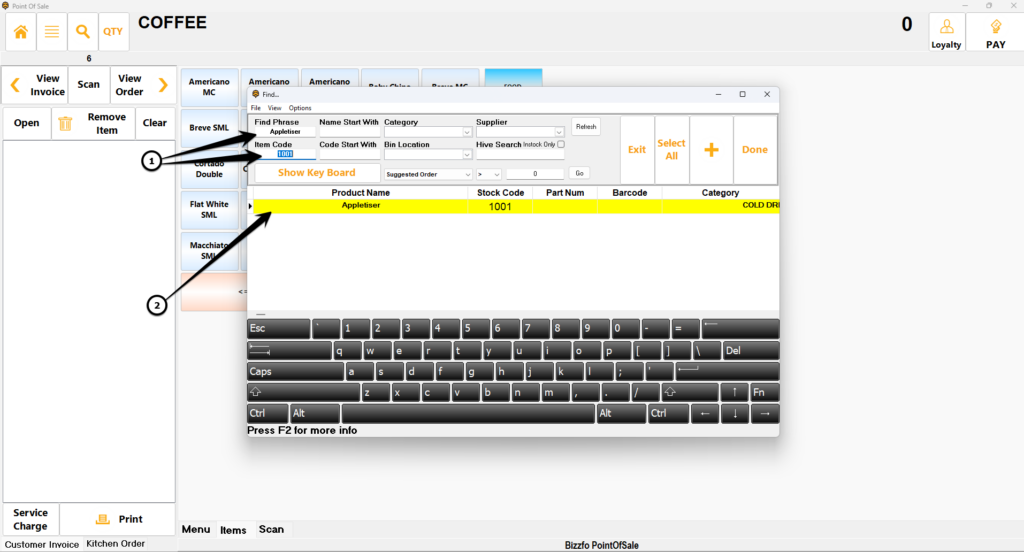
6. There will be a pop up on the screen to manually find the item being exchanged you can search for it with the various search fields provided on screen for example the name
7. After item is selected a reason for the item exchange will pop up. You can either keep the default reason or you can manually change it to a different reason if you want to and click on Done
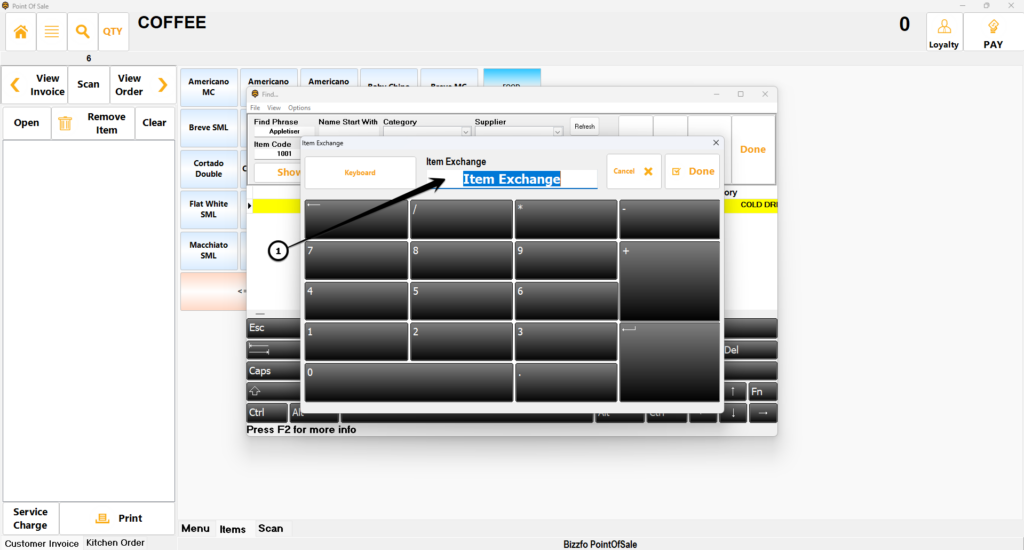
8. After the reason the quantity field will pop up and then you full in the amount of the item being brought back for exchange and click on Done
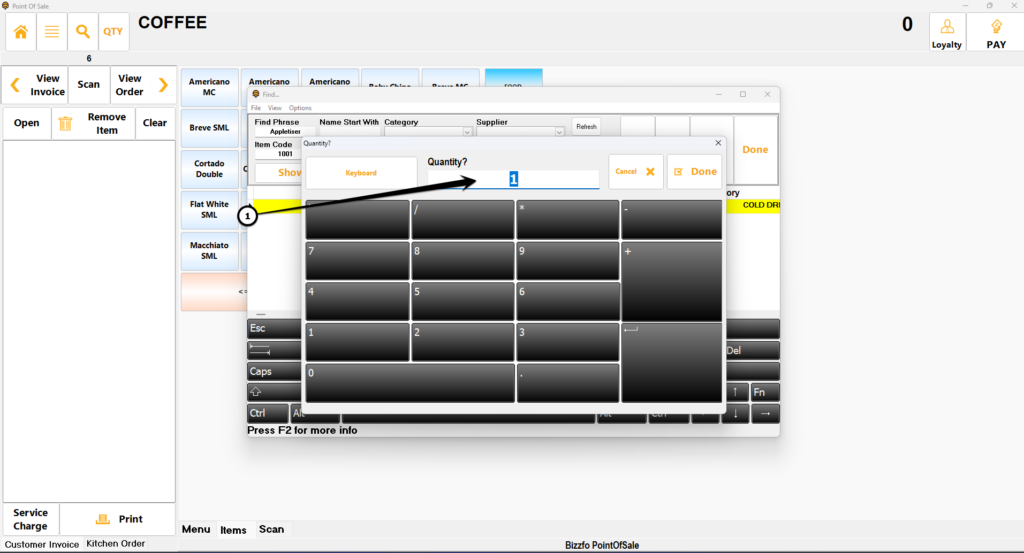
9. After the quantity being exchanged is filled in you will notice the amount due on top goes into a negative
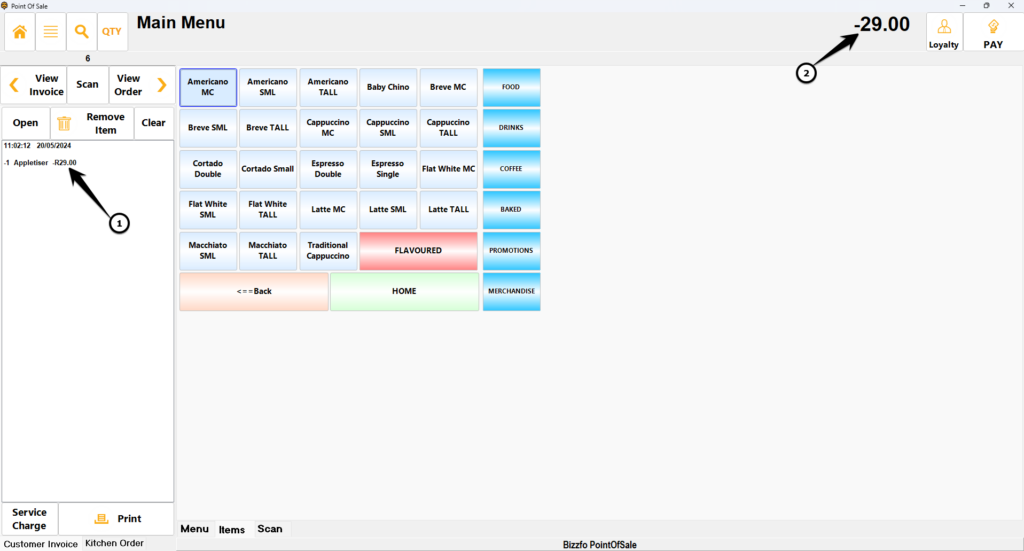
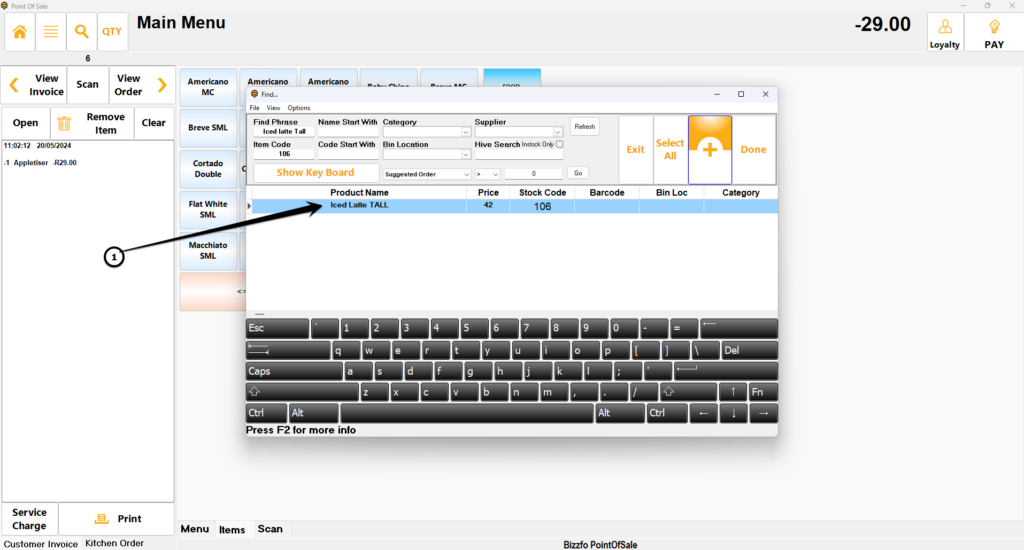
10. The next step will be to ring up the new item that the client will be taking. Following the same method as you would normally follow to ring up an item
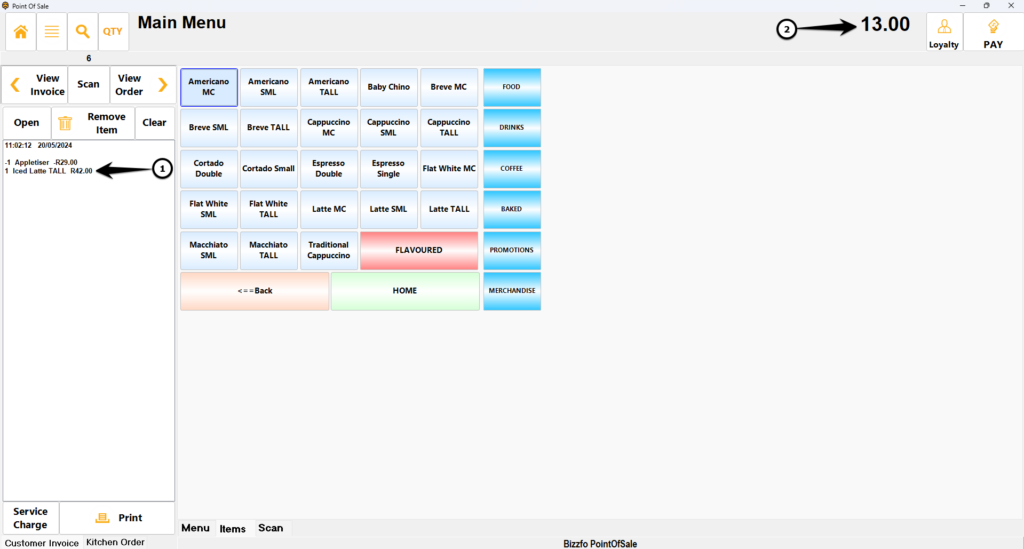
11. You will notice after item is added the amount due will change to the balance either owed to you or the amount you owe the client.
In this example the client needs to pay in the balance. You will then click pay and choose the tender type the client is using to settle the balance.
If you owe your client you would close off the sale by choosing the tender type you are giving them.
And that’s it! Happy trading


